Install and Enable the Optional Tray 1 Envelope Tray
- Product support for
- AltaLink C8130 / C8135 / C8145 / C8155 / C8170 Color Multifunction Printer
- Article ID
- KB0028902
- Published
- 2020-06-01
NOTE: The images in this procedure are for demonstration purposes only and may not specifically match your printer model; colors, icons, and other minor differences may exist.
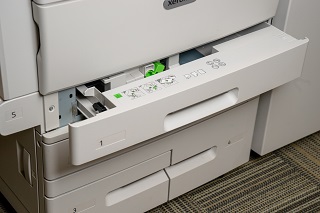
Open Tray 1.

Remove any paper loaded into Tray 1.
Pull out Tray 1 to its fullest extent.
Grab both sides of Tray 1 near the machine end.

Pull up gently on the tray until it clicks free of the machine.
Remove the tray from the machine.
Place tray on flat surface.
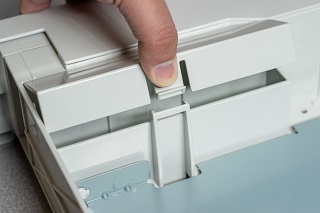
Press in tab and lift up on storage compartment cover.

Remove contents of storage compartment.
NOTE: Store the Standard tray in a safe place where it will not be damaged, such as a storage cabinet with sufficient space, or the Envelope Tray original box.Insert the Envelope Tray into the machine at a 30 degree angle.

Insert and lower the angle of the tray into the machine until it clips in place.
Press in tab and lift up on envelope tray storage compartment cover.
Deposit contents of previous tray's storage compartment.
Close the Envelope Tray.
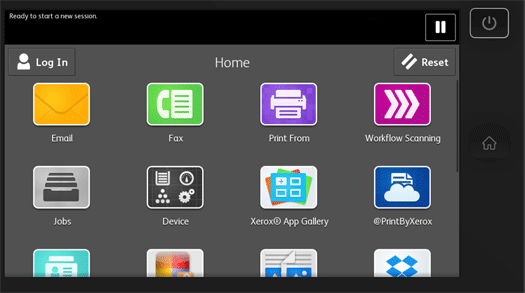
Login as Administrator at the Control Panel. For additional information, click on Access and Login or Logout as System Administrator at the Control Panel or Embedded Web Server (EWS).
Touch Device> Tools.


Touch Device Settings> Paper Management.

Touch Tray 1 Usage.

Touch Envelope Tray Only.
NOTE: Select Both Standard and Envelope Tray if frequently changing between the Standard and Envelope Tray.
Touch OK.
Logout as Administrator at the Control Panel.
Open the Envelope Tray.
Load the paper tray with the desired size of envelopes.
Close the Envelope Tray. The Paper Settings Tray 1 Screen will appear after boot up.

Select the envelope type loaded into Tray 1 under the Size drop down menu if not automatically detected.
Select Confirm.
