Use Workflow Scanning to Scan a Document
- Product support for
- AltaLink B8145 / B8155 / B8170 Multifunction Printer
- Article ID
- KB0029323
- Published
- 2021-11-01
Workflow Scanning Overview
 | The Workflow Scanning App allows you to scan an original document, distribute, and archive the scanned image file. The Workflow Scanning feature simplifies the task of scanning many multi-page documents and saving the scanned image files in one or more file locations. |
Note: The system administrator must set up this feature before you can use it.
The Workflow Scanning App enables you to scan documents using pre-defined settings to a range of file destinations quickly and easily. There are several workflow options:
Distribution workflows enable you to scan documents to one or more file destinations. File destinations include an FTP site, a website, and a network server. You can add fax destinations to workflows too.
Scan to Mailbox enables you to scan documents to public or private mailbox folders on the printer hard drive.
Scan to Home enables you to scan documents to a personal Home folder on your network.
Scan to USB enables you to scan documents to a connected USB Flash drive.
For information about all the App features and available settings, refer to Apps Features.
If authentication or accounting is enabled on your device, to access features, enter your login details.
Detect Imaging Security Marks
Imaging Security uses infrared light to track and manage sensitive documents.
If the Infrared Security option is enabled in the Embedded Web Server, the device can detect concealed marks using infrared technology. This method of detection can prevent the accidental disclosure of confidential documents.
The system administrator can configure infrared mark detection for jobs. When Detect Mark is enabled, the device detects security marks on documents that are scanned. When a security mark is detected during scanning, depending on the settings configured, the device inhibits the job, sends an email alert and continues the job, or sends an email alert and inhibits the job. When a security mark is detected, the device adds an entry to the Audit Log.
If a security mark is detected and the job is allowed to continue, a generic mark is added to the scanned image file to indicate that the original documents contained a security mark. The generic mark added to the file includes a predefined label and updated tracking information. If a security mark is detected on your job, a message appears on the control panel to indicate the action taken.
Using Workflow Scanning
To scan an original document:
Load your original documents.
For single pages or paper that cannot be fed using the duplex automatic document feeder, use the document glass. Lift the duplex automatic document feeder, then place the original document face down in the upper-left corner of the document glass.

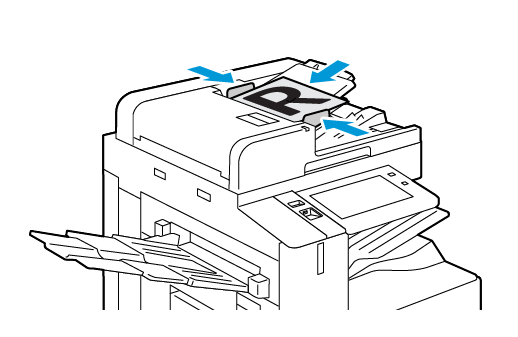
For multiple, single, or 2-sided pages, use the duplex automatic document feeder. Remove any staples and paper clips from the pages. Insert the original documents face up in the duplex automatic document feeder, with the top of the page entering the feeder first. Adjust the paper guides so that they fit against the original documents.

Note: When the original documents are detected, the automatic document feeder confirmation indicator LED illuminates.
At the printer control panel, press the Home button.
Touch Workflow Scanning.
To clear previous app settings, touch Reset.
To select a workflow, from the Pick a Workflow screen, touch an option. If necessary, to refresh the workflow list, touch Update.
Note: If the Pick a Workflow screen does not appear automatically, to display the screen, touch Change Workflow.If needed, enter recipients, workflow destination details, or browse to the location required for the scanned documents.
To add a file destination, touch Add File Destinations. From the list, select a file destination.
Note: You can add file destinations to a workflow from the predefined list of file repository settings.In the Embedded Web Server, to create a new workflow, you can add file destinations from the predefined list.
In the Workflow Scanning App, for a selected workflow, you can add more file destinations from the predefined list.
Adjust the workflow scanning settings as needed.
To save the scanned document as a specific file name, touch the attachment file name, enter a new name, then touch OK.
To save the scanned document as a specific file format, touch the attachment file format, then select the required format.
To define what action the device takes when the filename is used already, touch If File Already Exists. Select an option, then touch OK.
Note: If the Add to pdf folder option is not available, access the Embedded Web Server, then enable the Filing Option settings.If you are using the document glass, to combine pages into a single scan file, enable the Build Job feature. To enable the feature, touch the toggle button for Build Job.
If you are scanning from 2-sided original documents, touch 2-Sided Scanning, then select an option.
To start the scan, touch Scan.
If Build Job is enabled, when prompted, do these steps:
To change settings, touch Program Next Segment.
To scan another page, touch Scan Next Segment.
To finish, touch Submit.
To return to the Home screen, press the Home button.
Notes:
For remote scanning, a network connection is required.
For details about remote scanning, refer to the Help in the Embedded Web Server.
Print, copy, and fax jobs can print while you are scanning original documents or downloading files from the printer hard drive.