Remove and Reinstall the Drum Cartridge
- Product support for
- Xerox D136 Copier/Printer and D136 Printer, Xerox D95/D110/D125 Copier/Printer, Xerox ED95A/ED125 Copier/Printer
- Article ID
- KB0363295
- Published
- 2020-01-21
WARNING: Make sure the machine has stopped copying / printing and that the "Online" and "Job in Memory" LEDs on the User Interface are off before continuing with the steps below.
Power the machine off using the power switch on the Control Panel.
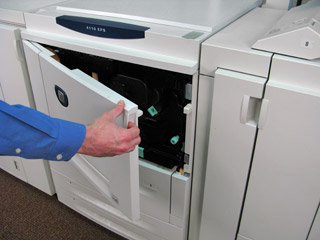
Open the Front Door.
If the Drum Latch cover is present, remove the screw from the Drum Latch cover using a 5.5 mm nut-driver or #2 Phillips screwdriver.

Move handle 2 to the unlocked position.

Move the Drum Lock lever to the unlocked position.

Grasp the Drum Cartridge, press in the Drum Latch, and then carefully pull the cartridge straight out until the handle on top of the cartridge is visible.

Make sure the cartridge is aligned with the rails, and then gently (but firmly) push the cartridge straight in until it clicks into position.

Move the Drum Lock lever to the locked position.
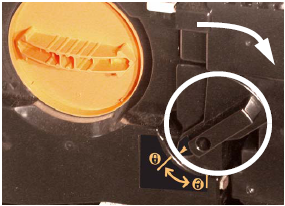
Move handle 2 to the locked position.

Replace Drum Latch cover, if previously removed.
Close the Front Door.
Power the machine on using the power switch on the Control Panel.