Print Files Directly From CentreWare Internet Services (CWIS)
- Product support for
- Xerox B210 Printer
- Article ID
- KB0326974
- Published
- 2019-08-26
Note: If you are accessing Xerox CentreWare Internet Services for the first time after printer installation, you will be prompted to change the default Administrator Account password. The initial default password is the printer serial number. For additional information on how to change the default Administrator password, refer to Change the System Administrator Password for CentreWare Internet Services (CWIS)..
You can print *.pdf, *.ps, *.pcl, *.txt, *.prn, *.tif, *.tiff, *.jpg, *.jpeg files directly from Xerox CentreWare Internet Services without having to open another application or the print driver. The files can be stored on a local computer hard drive, mass storage device, or network drive.
Printing Using CentreWare Internet Services (CWIS)
Note: The images in this procedure are for demonstration purposes only and may not specifically match your printer model; differences in colors, icons, available tabs/menus and supported options/settings may exist.
From a computer (on the same network as the printer) open a Web browser.
In the Web browser address field, enter the IP address of the printer and then press Enter or Return. The CWIS home page will be displayed.
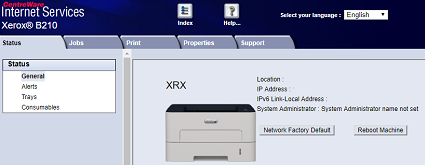
Click Print.
Note: Many features inCWIS require an administrator user name and password to access or modify. If prompted to enter Administrator Account login details:For User Name, enter Admin.
For Password, enter the administrator account password that was set during initial access to CWIS.
Click OK.
Select the Printing, Paper and Delivery options required for the job. For additional information, see the Print Options section below.
Select the print job file using the Browse or Choose File button. Locate the file required, then click Open.
To submit a job, click Submit Job.
Important: To ensure the job is printed, wait for the Job Submission confirmation window before navigating to another page.
Print Options
Job Submission provides selections for the print mode to use and options to adjust how the document appears on the printed page.
Printing
Use the Printing options to select the number of copies, orientation, and 2-Sided printing options.
Copies: This allows you to choose the number of copies to be printed. You can select 1 to 9999 copies. To use the default setting for number of copies, select the Auto button.
Orientation: This allows you to select the direction in which information is printed on a page.
Auto: Selects the default orientation setting.
Portrait: Prints across the width of the page, letter style.
Landscape: Prints across the length of the page, spreadsheet style.
2-Sided Printing: You can print on both sides of a sheet of paper. Before printing, decide how you want your document oriented.
Auto: Selects the default 2-Sided Printing setting.
1-Sided: This option prints on one side of the media. Use this option when printing on envelopes, labels, or other media that cannot be printed on both sides.
2 Sided, Flip on Long Edge: This option prints the job on both sides of the paper to allow binding on the long edge of the paper. The following illustrations show the result for documents with portrait and landscape orientations.
2 Sided, Flip on Short Edge: Prints on both sides of the paper. The images print to allow binding on the short edge of the paper. The following illustrations show the result for documents with portrait and landscape orientations.
Paper
You can print on custom paper sizes that are within the minimum and maximum size range supported by the printer.
Paper Size: This allows you to set the size of paper required for printing. Select the paper size required from the list. If the paper size is set to Auto, the printer automatically selects the paper size based on the original document.
Paper Type: Set this option to correspond to the paper loaded in the tray selected. This will provide the best quality printout. If printing Envelopes, ensure the Envelope type is selected. If the paper type is set to Auto, the printer automatically selects the paper type based on the printer settings.
Delivery
To print the job now, click the Immediate print option.
To restore the default values of any print job, click the Restore Default Values button.