Configure SNMP Settings Using Xerox CentreWare Internet Services (CWIS)
- Product support for
- Xerox B210 Printer
- Article ID
- KB0326972
- Published
- 2019-08-26
Note: If you are accessing Xerox CentreWare Internet Services for the first time after printer installation, you will be prompted to change the default Administrator Account password. The initial default password is the printer serial number. For additional information refer toChange the System Administrator Password for CentreWare Internet Services (CWIS).
Simple Network Management Protocol (SNMP) is a set of network protocols designed to allow you to manage and monitor devices on your network.
You can use the SNMP configuration pages in Xerox CentreWare Internet Services to:
Enable or disable Authentication Failure Generic Traps.
Enable SNMPv3 to create an encrypted channel for secure printer management.
Assign privacy, authentication protocols, and keys to Administrative and key user accounts.
Assign read and write access to User accounts.
Limit SNMP access to the printer using hosts.
Note: The images in this procedure are for demonstration purposes only and may not specifically match your printer model; differences in colors, icons, available tabs/menus and supported options/settings may exist.
Enabling SNMP Using Xerox CentreWare Internet Services
From a computer (on the same network as the printer) open a Web browser.
In the Web browser address field, enter the IP address of the printer and then press Enter or Return. The CWIS home page will be displayed.
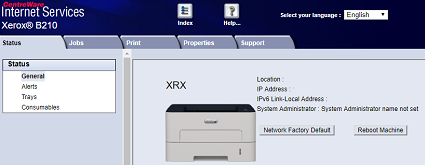
Click Properties.
Note: Many features in CWIS require an administrator user name and password to access or modify. If prompted to enter Administrator Account login details:For User Name, enter Admin.
For Password, enter the administrator account password that was set during initial access to CWIS.
Click OK.
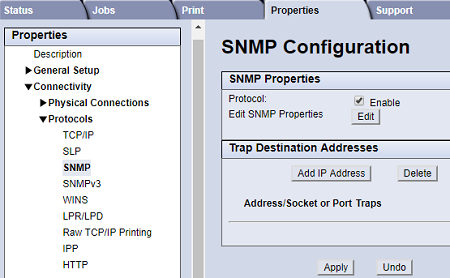
Click Connectivity.
Click Protocols.
Click SNMP.
For Protocol, select Enable.
To configure the SNMP properties, for Edit SNMP Properties, click Edit.
For Community Names, enter the GET and SET community names.
For Default TRAP Community Name, type a name.
For Authentication Failure Generic Traps, to generate a trap for every SNMP request received by the printer which contains an invalid community name, click Enable.
Click Apply.
Configuring SNMP Trap Destination Address Using Xerox CentreWare Internet Services
In the Trap Destination Address section, click Add IP Address.
For IP Trap Destination Address, type the IP address of the host running the SNMP manager that receives traps.
Type the UDP Port Number.
To add the traps, perform the following steps.
For TRAP Community Name, type a name.
For Traps to be Received, select the type of traps that the SNMP manager receives.
Click Apply.
SNMPv3
SNMPv3 is the current standard version of SNMP defined by the Internet Engineering Task Force (IETF). It provides three important security features:
Message integrity to ensure that a packet has not been tampered with in transit
Authentication to verify that the message is from a valid source
Encryption of packets to prevent unauthorized access
Configuring SNMPv1/v2c with SNMPv3 Using Xerox CentreWare Internet Services
SNMP version 1 (SNMPv1) is the initial implementation of the SNMP protocol. SNMPv1 operates over protocols such as User Datagram Protocol (UDP).
SNMPv2c includes improvements in performance, confidentiality, and manager-to-manager communications over SNMPv1, however it uses the simple-community based security scheme of SNMPv1.
From a computer (on the same network as the printer) open a Web browser.
In the Web browser address field, enter the IP address of the printer and then press Enter or Return. The CWIS home page will be displayed.
Click Properties.
Note: If prompted to enter a user name and password, for information about logging in as an administrator, refer to Accessing the Xerox CentreWare Internet Services Administrator Account.Click Connectivity.
Click Protocols.
Click SNMPv3.
For Allow SNMPv3 with SNMPv1/v2c, select Enable.
For SNMPv3, select Enable.
Note: Some options become editable after you enable SNMPv3.For User Name, type the administrative user name for SNMPv3 authentication.
For Authentication Password, type a password. The Authentication Password is used to generate a key used for authentication.
For Algorithm, select an encryption checksum algorithm.
For Privacy Password, type a password. The Privacy Password is used for encryption of SNMPv3 data. The passphrase used to encrypt the data must match the passphrase on the Server.
Note: Ensure that the passwords are at least eight characters in length. You can include any characters except control characters.Click Apply.
