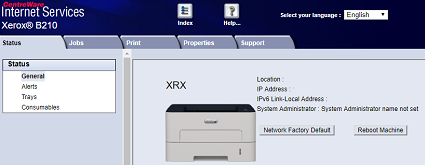
Configure 802.1x Settings Using CentreWare Internet Services (CWIS)
- Product support for
- Xerox B210 Printer
- Article ID
- KB0326393
- Published
- 2019-08-23
Note: If you are accessing Xerox CentreWare Internet Services for the first time after printer installation, you will be prompted to change the default Administrator Account password. The initial default password is the printer serial number. For additional information refer to Change the System Administrator Password for CentreWare Internet Services (CWIS).
802.1x is an Institute for Electrical and Electronics Engineers (IEEE) standard that defines a method for port-based network access control or authentication. In an 802.1x secured network, the printer must be authenticated by a central authority, typically a RADIUS server, before it can access the physical network.
Before you begin:
Ensure that your 802.1x authentication server and authentication switch are available on the network.
Determine the supported authentication method.
Create a user name and password on your authentication server.
Note: This procedure causes the printer to restart and be unavailable over the network for several minutes.
Configuring 802.1x
From a computer (on the same network as the printer) open a Web browser.
In the Web browser address field, enter the IP address of the printer and then press Enter or Return. The CWIS home page will be displayed.

Click Properties.
Note: Many features in CWIS require an administrator user name and password to access or modify. If prompted to enter Administrator Account login details:For User Name, enter Admin.
For Password, enter the administrator account password that was set during initial access to CWIS.
Click OK.
Click Security.
Click 802.1x.
For 802.1x, select Enabled.
For Authentication Method, select an option:
EAP-MD5
PEAP
EAP-MSCHAPv2
EAP-TLS
If you select EAP-MD5, EAP-MSCHAPv2 or PEAP, the Credentials option appears. Enter the required details in the Username and Password fields.
To upload a root certificate:, do the following steps.
For Upload Root Certificate, to locate and select the file, click Browse or Choose File.
Click Upload.
To upload a client certificate, do the following steps.
To locate and select the Client Certificate, for Upload Client Certificate, click Browse or Choose File.
To assign a private password, for Private Key Password, type a password.
Click Upload.
Click Apply.
