Add or Edit Contacts in the Address Book Using CentreWare Internet Services (CWIS)
- Product support for
- Xerox B205 Multifunction Printer
- Article ID
- KB0325623
- Published
- 2019-08-20
Address Book Overview
Use the Address Book to store addresses for all your Scan and Email jobs. Once the Address Book has been setup during installation and setup, you can enter individual addresses and create groups and store them in your Address Book for repeated use.
Note: If you are accessing Xerox CentreWare Internet Services for the first time after printer installation, you will be prompted to change the default Administrator Account password. The initial default password is the printer serial number. Refer to Change the System Administrator Password for CentreWare Internet Services (CWIS) for additional information.
Adding Contacts in the Address Book Using Xerox CentreWare Internet Services:
From a computer (on the same network as the printer) open a Web browser.
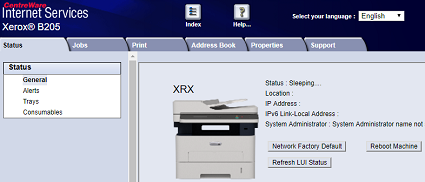
In the Web browser address field, enter the IP address of the printer and then press Enter or Return. The CWIS home page will be displayed.
Click Address Book.
Note: Many features in CWIS require an administrator user name and password to access or modify. If prompted to enter Administrator Account login details:For User Name, enter Admin.
For Password, enter the administrator account password that was set during initial access to CWIS.
Click OK.
Click the Add button.
Provide information for the following fields:
First Name: Type the first name that you want to appear in the Address Book.
Last Name: Type the last name that you want to appear in the Address Book.
Company: Type the company name to which the contact is associated.
Display Name: Type the name of the contact as you want the name to appear on the printer control panel. The Display Name is required.
Email: Type the email address for the address book contact.
Click the Scan To Destination plus icon.
Provide information for the following fields:
Nickname: Type the name of the scan destination. The nickname is required.
Protocol: Select the format of the file transfer.
Address Type: Identify the address type of your computer. Select IPv4 Address or Host Name, then enter the required information.
Document Path: Enter the path, and the directory or folder name where the scanned files are stored on your computer.
Login Name: Enter your computer user name. The Login Name is required.
Password: Enter your computer login password.
Retype Password: Enter your login password again.
To save the new password, click Select to save new password.
To add another contact, click Add Another Contact After Saving.
Click Save.
Adding Groups in the Address Book Using Xerox CentreWare Internet Services:
From a computer (on the same network as the printer) open a Web browser.
In the Web browser address field, enter the IP address of the printer and then press Enter or Return. The CWIS home page will be displayed.
Click Address Book.
Note: Many features in CWIS require an administrator user name and password to access or modify. If prompted to enter Administrator Account login details:For User Name, enter Admin.
For Password, enter the administrator account password that was set during initial access to CWIS.
Click OK.
Click Groups.
Click the Add Group button.
In the Group Name field, type the group name.
To add contacts to the group:
To add individual members to the group, click each contact required. Each contact selected is added to the Group Members list.
To add all contacts to the group, click Add All.
To remove contacts from the group:
To remove individual members from the group, click each contact requiring removal. Each contact selected is removed from the Group Members list.
To remove all contacts from the group, click Remove All.
Click Save.
Editing or Deleting Contacts in the Address Book Using Xerox CentreWare Internet Services:
From a computer (on the same network as the printer) open a Web browser.
In the Web browser address field, enter the IP address of the printer and then press Enter or Return. The CWIS home page will be displayed.
Click Address Book.
Note: Many features in CWIS require an administrator user name and password to access or modify. If prompted to enter Administrator Account login details:For User Name, enter Admin.
For Password, enter the administrator account password that was set during initial access to CWIS.
Click OK.
Select the contact requiring editing or deleting.
Edit or delete the contact:
To edit the selected contact name or contact information, click Edit. Edit the information as needed. To save the changes, click Save.
To delete the selected contact from the Address Book, click Delete. At the prompt, click OK.
Editing or Deleting Groups in the Address Book Using Xerox CentreWare Internet Services:
From a computer (on the same network as the printer) open a Web browser.
In the Web browser address field, enter the IP address of the printer and then press Enter or Return. The CWIS home page will be displayed.
Click Address Book.
Note: Many features in CWIS require an administrator user name and password to access or modify. If prompted to enter Administrator Account login details:For User Name, enter Admin.
For Password, enter the administrator account password that was set during initial access to CWIS.
Click OK.
Select the group requiring editing or deleting.
Edit or delete the group:
To edit the selected group name or members, click Edit Group. Edit the information as needed. To save the changes, click Save.
To delete the selected group from the Address Book, click Delete Group. At the prompt, click OK.