Clear a Paper Jam in Tray 1
- Product support for
- Xerox B205 Multifunction Printer
- Article ID
- KB0324854
- Published
- 2019-08-06
The following are the top reasons why paper jams occur:
unsupported paper/media is used.
incorrect paper settings in the tray and/or the print driver.
paper loaded incorrectly and/or paper edge guides not adjusted properly in the tray.
humidity and/or paper condition and storage.
To resolve the error that appears on the control panel, clear all paper from the paper path.
Note: If you cannot clear the paper jam by following the Clearing a Paper Jam in Tray 1 procedure, refer to the Clearing Paper Jams from Inside the Printer section below.
Clearing a Paper Jam in Tray 1:
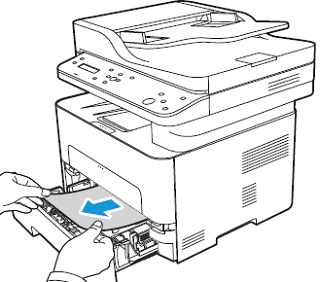
Pull out the paper tray
Remove any jammed paper by gently pulling it straight out.
Release the two green latches positioned above where the paper tray sits.
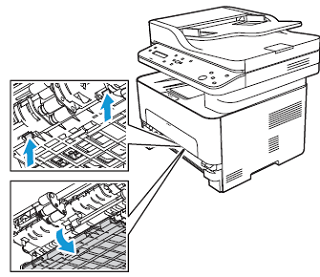
When the baffle drops down, remove any paper from that area of the paper path.

Push the baffle back up in place until the two latches click.
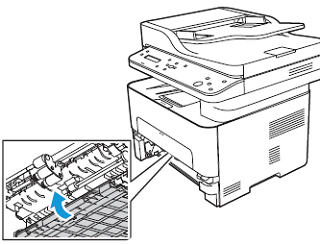
Ensure the paper is loaded correctly. Insert the tray back into the printer until it snaps into place. Printing automatically resumes.
Clearing Paper Jams from Inside the Printer:
To resolve the error that appears on the control panel, clear all paper from inside the printer.
CAUTION: Some areas of the printer are hot. Take care when removing paper from the printer.
Open the front cover.
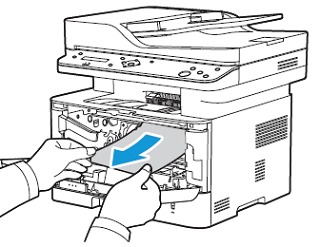
Pull the toner cartridge out.
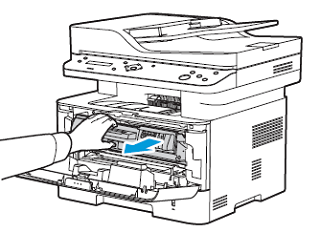
Remove the jammed paper by gently pulling it straight out.
Re-install the toner cartridge by inserting it slowly into the printer.
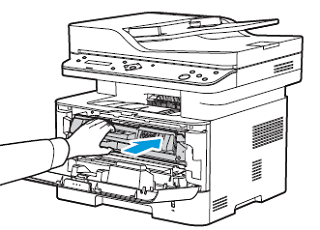
Close the printer cover. Printing automatically resumes.