Set up Scanning on an EFI Fiery EX700 Color Server (Version 1.5) Using the SMB Protocol
- Product support for
- Xerox 700i/700 Digital Color Press, Xerox 770 Digital Color Press
- Article ID
- KB0324746
- Published
- 2015-07-22
This solution will provide step-by-step instructions on how to set up an SMB template on an EFI Fiery EX700 Color Server (version 1.5).
The steps can be performed on any client workstation on the network that has access to the Fiery’s WebTools (Fiery’s web interface).
NOTE: A valid SMB share setup is required in order for the scan to be transferred from the Fiery Server to the required location. If necessary, contact your System Administrator for additional assistance.
From the computer, open an Internet browser window.
Enter the IP address of the printer in the Address field, and then press [Enter] on the keyboard. The CentreWare Internet Services window will be displayed.

Click on the [Scan Settings] tab. The Scan Templates window will be displayed.
Enter the Administrator user name and password in the login fields provided, and then click on [Login].
NOTE: The default Administrator user name is "admin" and the password is "Fiery.1". If the password has been modified, contact your System Administrator.
A list of templates that are created under the Administrator account will be displayed. There will be buttons available to create, Import, or Export templates.Click on the [New Template] button (empty page with an * in the upper left corner).

Enter a name for the template in the Name field under the General Settings section. The name must be in all capital letters with no spaces.
In the Scan Destination section, click on the [SMB] check box.
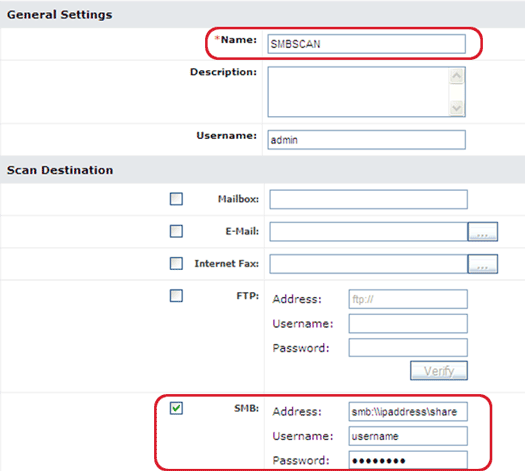
Enter the IP address or hostname in the Address field with the share name assigned to the SMB share on the client or server in the following format: smb:\\\\ipadress\\share.
Enter the user name and password of the SMB share in the fields provided.
Click on [Save] at the bottom of the window to complete the creation of the template.