Perform the Print Calibration Procedure
- Product support for
- WorkCentre 7830/7835/7845/7855, WorkCentre 7970
- Article ID
- KB0237720
- Published
- 2019-02-20
Step 1: Clean the CVT Glass and the Printhead Lenses
Before you perform the Print Calibration Process, it is important to clean the CVT Glass and the Printhead Lenses.
To Clean the CVT Glass:
Crumple up a piece of paper and, with moderate pressure, use the paper to remove any particles that might be stuck on the CVT glass. Then use a damp, lint-free cloth to clean the glass. Only use Xerox Cleaning Fluid or Xerox Anti-Static Cleaner to clean the glass. Do not use water. Pour the cleaner on the cloth. Do not pour it directly on the glass.

To Clean the Printhead Lenses:
CAUTION: Do not perform this procedure when the printer is copying or printing.
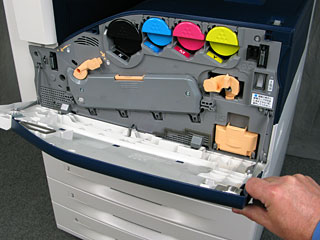
Open the Front Cover of the printer.

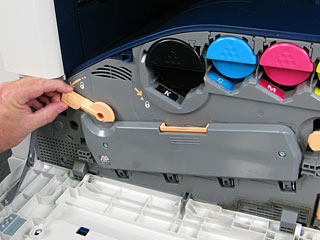
Turn the orange lever to the left.

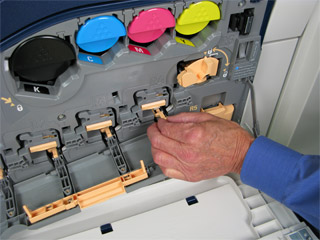
Pull the Drum Cartridge Cover down until it clicks into the open position.

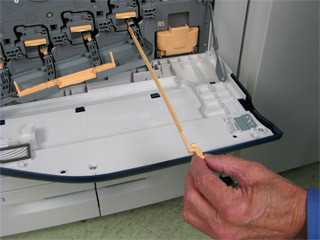
Each of the four printheads has its own cleaning tool. Slowly pull the printhead lens cleaner out until the three dots are visible.

NOTE: The printhead lens cleaner does not detach from the printer.
Slowly push the printhead lens cleaner back into the printhead until it stops.
Pull the lens cleaner out again and push it back in two more times.
NOTE: If there is toner on the lens cleaner, wipe it off with a clean lint-free cloth.Repeat steps 4 - 6 for each printhead.
Close the Drum Cartridge Cover.

Turn the orange lever to the right to return it to the locked position.

Close the Front Cover.
Step 2: Perform the Print Calibration Process
IMPORTANT: This procedure requires A4 or Letter size, plain white paper (80 gsm / 20 lb).
Press the Machine Status button on the Control Panel.

Select the Tools tab.

Select Troubleshooting.
Select Calibration.
Select Reset Print Calibration.
Select Next.

Select Close to return to the Troubleshooting section.

Select Print Calibration.

Select Next.

Follow the on-screen instructions to run the Print Calibration procedure.