Modify the Paper Tray Settings in the Machine Administration Mode
- Product support for
- WorkCentre 7655/7665/7675
- Article ID
- KB0237679
- Published
- 2015-10-22
NOTE: See the Related Content for additional information regarding loading and configuring the Paper Trays.
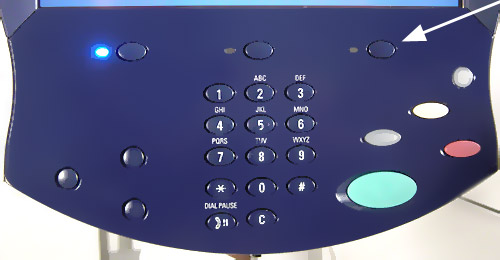
Press the [Log In / Out] button on the Control Panel. The Log In window will be displayed. See the Related Content for additional information regarding logging into the WorkCentre.
Press the [Machine Status] button on the Control Panel.
Select the [Tools] tab on the Touch Screen. The Tools tab will be displayed
Select [Paper Tray Management].
Select [Tray Settings] under the Groups column.
Select [Tray Settings] under the Features column.
Select the required tray, and then select the [Change Settings] button. The Change Settings screen will be displayed.
Select the [Dedicated] or [Adjustable] button under Tray Type.
If the tray is set to Adjustable, a pop-up screen will be displayed when the tray is opened and then closed. The pop-up screen will display the option to confirm or change the paper size, type and color. The paper tray edge guides automatically detect the size of the paper loaded.
If the tray is set to Dedicated, a pop-up screen will be displayed when the tray is opened and then closed. The pop-up screen will identify the media type that should be loaded in the tray. If the wrong size media is loaded, or if the tray guides are set incorrectly, the WorkCentre will display a warning to adjust the guides. Only the Machine Administrator can change the paper attributes for a Dedicated tray.
Use the [Left] or [Right] arrow buttons to select from 1 to 99 under Tray Priority.
NOTE: The Priority setting determines which tray is used when two trays are loaded with the same paper and Auto Paper Select is selected from the Basic Copy screen. The Priority setting determines which paper trays are displayed on the Basic Copy screen. The trays with the highest priority are displayed. One is the highest and 99 is the lowest priority. This setting is permanent for all jobs unless modified again by a Machine Administrator.Select the [Enable] or [Disable] button under Auto Selection.
NOTE: When Auto Selection is Enabled, the machine selects which tray to feed paper from that will match the job requirements. Auto selection only works with trays that contain the default color and type to prevent special stock from being used on ordinary copy jobs. For print jobs, the user specifies the size and type of paper required and the machine will auto select a paper tray that contains the appropriate stock. Auto Select also enables the machine to automatically switch from one auto select tray to another when a tray runs out of paper.Select [Save] to save the changes.
Press the [Log In / Out] button on the Control Panel. The Logout screen will be displayed.
Select [Logout] on the Touch Screen to return to the Services screen.
Related Content
Load Paper Trays 1 and 2 and Configure the Tray Settings on the Touch Screen
VIDEO: How To Modify Paper Tray Settings in the Machine Administration Mode