Replace a Drum Cartridge
- Product support for
- WorkCentre 6515
- Article ID
- KB0229382
- Published
- 2018-04-27
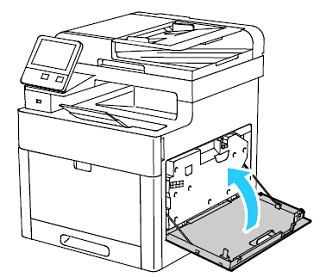
Open the right-side door.
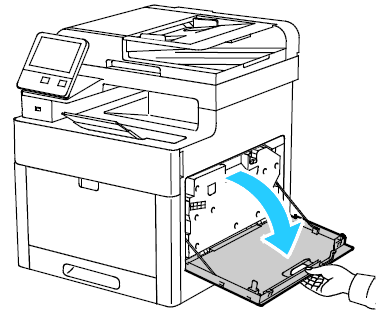
Carefully remove the waste cartridge.
CAUTION:Be very careful when removing the waste cartridge to prevent spilling toner. Do not shake or turn the cartridge over.Press down on the waste cartridge release latch.
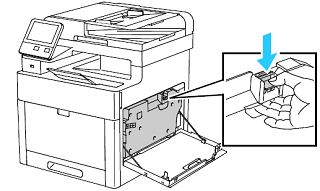
Gently rotate the cartridge downward until it lies flat.
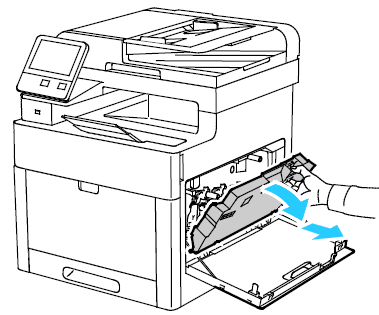
Keep the cartridge flat, lift it with both hands, and then place it on a flat surface.

CAUTION: Do not touch the printhead lenses (ROS windows) on the waste cartridge.
Remove the appropriate drum cartridge.
Press down on the drum cartridge release lever to unlock the cartridge.

Grasp the release lever, and then partially pull the cartridge out of the machine.
While still holding the lever with one hand, grasp the left side of the cartridge with your other hand and then completely remove the cartridge from the machine.

NOTE: To return the used drum cartridge for recycling, follow the instructions included with the new cartridge.
Remove the new drum cartridge from its packaging.

CUATION: Do not expose the new drum cartridge to light for more than 5 minutes as it can lower the life of the cartridge or cause print quality degradation.Carefully install the new cartridge into the printer.
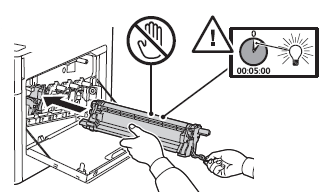
Lift up on the drum cartridge release lever to lock the cartridge into place.


Remove the cleaning rod from inside the printer.

Insert the cleaning rod into one of the four cleaning holes until it stops, then pull out the rod. Repeat this two more times.

Repeat the procedure for the holes in the other three slots.
Return the cleaning rod to its original location.

To reinsert the waste cartridge, lower the bottom of the cartridge into position and then lock the cartridge into place by pushing the top forward until its latch clicks.


Close the right-side door.
