Configure and Connect the Printer to a Wireless Network From the Control Panel
- Product support for
- VersaLink C400 Color Printer, VersaLink C405 Color Multifunction Printer
- Article ID
- KB0129318
- Published
- 2019-10-07
Note: Before you begin, purchase the Xerox Wireless Network Interface.
Step 1: Install the Wireless Network Adapter
The optional Wireless Network Adapter plugs into the back of the control board. After the adapter has been installed, and wireless networking has been enabled and configured, the adapter can connect to a wireless network.
Note: The images provided are for demonstration purposes only. Your printer may vary slightly from the images provided.
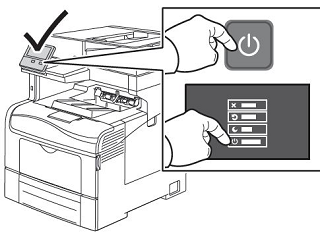
At the printer control panel, press the Power/Wake button and select Power Off.
Overview of install:
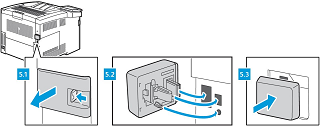
To remove the Wireless Network Adapter Port Cover, press the latch to the left, then pull the cover away from the printer.

Remove the Wireless Network Adapter from the packaging.
CAUTION: Pulling on the adapter can cause damage. After the adapter is installed, remove it only as needed, and as directed in the Wireless Network Adapter removal instructions. For details, refer to Remove the Optional Wireless Network Adapter (WNA).To install the Wireless Network Adapter, follow the procedure defined on the instruction sheet provided with the Wireless Network Adapter.

Power on the printer.
To verify the wireless status and see the wireless IP address, print a Configuration Report and examine the Connectivity Physical Connections, Connectivity Protocols, and TCP/IPv4 sections of the report.
Press the Home button.
Select Device > About.
Scroll down and select Information Pages > Configuration Report. The report will print.
Note: The printer uses separate IP settings for wired and wireless network connections. When you switch from a wired connection to a wireless connection, the IP address of the printer changes.
Step 2: Configure Wi-Fi
To enable Wi-Fi at the control panel:
At the printer control panel, press the Home button.
If prompted, log in as an administrator.
Note: Depending on when the device was manufactured, the default password may be the device serial number or 1111.Touch Device > Connectivity > Wi-Fi.
To enable Wi-Fi, for Wi-Fi, touch the enable toggle button.
In the list of available Wi-Fi networks, touch the desired network.
If needed, type the password to use to log on to the network.
Make sure Wi-Fi frequency band is defaulted to AUTO, then touch OK.
To configure Wi-Fi manual setup at the control panel:
At the printer control panel, press the Home button.
If prompted, log in as an administrator.
Note: Depending on when the device was manufactured, the default password may be the device serial number or 1111.Touch Device > Connectivity > Wi-Fi.
Ensure that the Wi-Fi toggle button is enabled.
Touch Manual Setup.
In the first field, type a name for the Wi-Fi network.
Touch Network Type, then select an option.
Touch Security, then select an option.
Touch Wi-Fi Protected Setup (WPS), then select an option.
Touch OK.
Step 3: Configure the Primary Network
NOTE: Setup for Primary Network is only required if WiFi is installed and enabled. Without WiFi, the Primary Network is set to Ethernet.
At the printer control panel, press the Home button.
If prompted, log in as an administrator.
Touch Device > Connectivity.
Touch Primary Network and select the appropriate network type for how the printer is connected.
If the printer is connected with an Ethernet cable, select Ethernet.
If the optional Wireless Network Adapter is installed and connected to a wireless network, then select Wi-Fi.
If you made a change to the primary network settings, you will be prompted to restart. Touch Restart Now.
Step 4: Print a Configuration Report to Obtain the IPv4 Address
Press the Home button.
Select Device > About.
Scroll down and select Information Pages > Configuration Report. The report will print.
Locate the IPv4 address under the Connectivity section on the report. You are now ready to install the print driver.