Replace the Required Toner (Dry Ink) Cartridge
- Product support for
- VersaLink C400 Color Printer, VersaLink C405 Color Multifunction Printer
- Article ID
- KB0129137
- Published
- 2022-03-16
Note: Videos are available at the end of this article.
CAUTION: Do not use warm water or cleaning solvents to remove Toner (Dry Ink) from your skin or clothing. This will set the Toner and make it difficult to remove. If any Toner gets on your skin or clothing, use a brush to remove the Toner, or wash it off with cold water and mild soap.
NOTE: The images in this procedure are for demonstration purposes only and may not specifically match your printer model; colors, icons, and other minor differences may exist.
For additional product and material safety information, click Xerox Environment, Health and Safety under the Related Content.
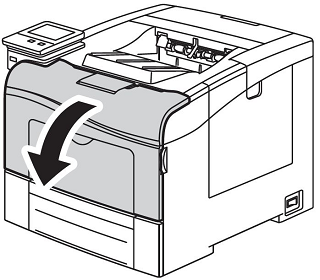
Push down on the release button, and lower the Front Door into the open position.
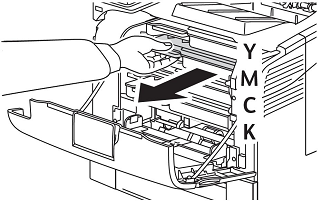
NOTE: There are 4 Toner Cartridges; one cartridge for each Toner color. From the top of the printer to the bottom, the corresponding colors are Yellow (Y), Magenta (M), Cyan (C), and Black (K).Pull the required Toner Cartridge out of the printer.
Place the old cartridge aside for recycling or disposal.
IMPORTANT: Place any suspected defective cartridge that is removed from the printer in protective wrapping/packaging material for situations where it may still be a functioning cartridge. If you do not have the original packaging material, use the packaging from the new cartridge.

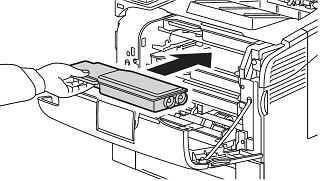
Remove the new Toner Cartridge from the packaging and gently rock the Toner Cartridge back and forth six times.

NOTE: Do not rock the Toner Cartridge too hard or Toner may spill out.Line up the new Toner Cartridge with the required location and push the cartridge into the printer until the cartridge clicks into place.
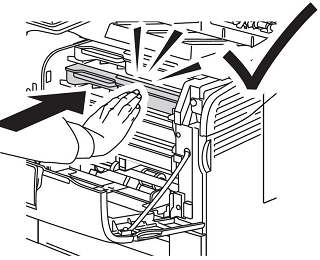
Close the Front Door.

Video:
NOTE: The video in this procedure is for demonstration purposes only and may not specifically match your printer model; colors, icons, and other minor differences may exist.