Replace the Maintenance Kit (Feed Rollers, Transfer Roller, Transfer Belt)
- Product support for
- Phaser 6700
- Article ID
- KB0091343
- Published
- 2016-11-21
NOTE: A message will be displayed on the Control Panel when the Maintenance Kit needs to be replaced.
To view the Maintenance Kit video:
A video displaying the Maintenance Kit replacing procedure can be viewed on the Control Panel.
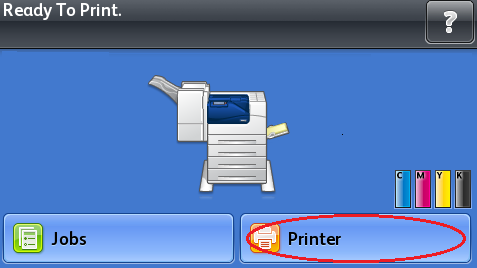
Select [Printer] on the Touch Screen.
Select the [Tools] tab.
Select [Troubleshooting].

Select [Resolve Problems].

Select [Repeating Spots or Lines].

Select the [Video] button, and then select [Maintenance Kit] from the list.

To replace the Maintenance Kit:
NOTE: Before replacing any part of the Maintenance Kit, power off the printer and disconnect the power cord from the electrical outlet. See the Related Content section for additional information.
WARNING: Internal parts of the printer can be hot. Allow 30 minutes for the printer to cool before proceeding.
To replace the feed rollers:
Pull out Paper Tray 2 to remove it from the printer.
Replace the feed rollers inside of the printer:
Rotate the feed roller until the roller hook is visible.

NOTE: The rollers are located approximately 165 mm (6.5 in.) inside the printer, measuring from the tray opening.Pull the feed roller hook out of the groove on the axle, and then slide the feed roller to the front.

Follow the same procedure to remove the second feed roller.
Align the hole of the new feed roller with the axle.

Slide the feed roller along the axle until the protrusions fit completely into the slots, and the roller hook reseats into the groove.

Follow the same procedure to install the second feed roller.
Replace the Feed Roller Cartridge in the tray.
NOTE: The procedure is the same for replacing the Feed Roller Cartridge in any of the standard and optional trays.Move the feed roller cover to the left to open it, and hold the cover open.

Turn the Feed Roller Cartridge to the right.

Pull out the rear axle, then the front axle, and then remove the cartridge.

Unpack the new Feed Roller Cartridge.
Move the feed roller cover to the left to open it, and hold the cover open.
Slide the front axle, then the rear axle of the feed roller cartridge into the holes in the tray.

Turn the Feed Roller Cartridge to the left to lock it in place.

Move the feed roller cover to the right to close it.

Insert the tray into the printer.
To replace the Transfer Roller:
Lift the Right Side Door Latch, and then open the door.

Unlock the two levers on the Transfer Roller, and then lift up the roller to remove it.

Grasp the levers on both sides of the new Transfer Roller and align the arrows on the roller with the arrows inside the printer.

Lower the front of the roller until it clicks into place.
Close the Right Side Door.
Replace the Transfer Belt:
CAUTION: To avoid image quality issues, only hold the Transfer Belt by the handles. Do not touch other parts of the unit.
Open the Front Door.

Rotate the two lock levers to release the Imaging Unit Door, and then lower it.

CAUTION: Do not expose the Imaging Unit to direct sunlight or strong light from indoor fluorescent lighting. Image quality may deteriorate if a unit is exposed to light longer than five minutes.Grasp the handle on the front of the Transfer Belt, and then pull out the belt until the line on the belt is visible.

Grasp the handles on the top of the Transfer Belt, and then pull to remove it from the printer.

Slide the gold tab inside the Right Side Door back and forth five times.

Unpack the new Transfer Belt and place it on a level surface.
Remove the protective parts.
Grasp the handles on top of the Transfer Belt, and then align the arrows on the belt with the arrows on the printer.

Slide the belt into the printer until the visible line reaches the printer.

Lower the handles, and then push the Transfer Belt in until it stops.

Close the Imaging Unit Door.
Rotate the two lock levers to secure the Imaging Unit Door.

Close the Front Door.
To reset the Maintenance Kit Counter:
Connect the power cord back into the electrical outlet.
Power on the printer.
Select [Printer] on the Touch Screen.
Select the Tools tab.
Select [Setup].

Select [Service Tools].

Select [Reset HFSI Counters].

Select Maintenance Kit].
Select [Reset Counter].
