Clear the Paper Jam in Paper Tray 1
- Product support for
- Phaser 6600
- Article ID
- KB0090836
- Published
- 2016-01-22
To resolve the error displayed on the Control Panel all paper must be cleared from the paper path.
Remove any paper from the Bypass tray. If the Bypass Tray is not currently being used, lower the tray into operating position.

Grasp both sides of the Bypass Tray, and pull the tray straight out of the printer.
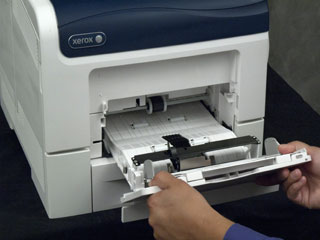
Pull Paper Tray 1 until it stops.
To remove the tray, lift the front of it slightly, and then pull it out of the printer.

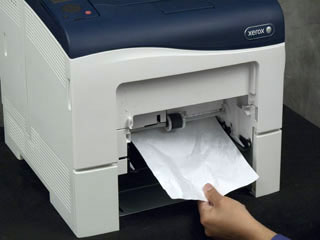
Remove any jammed paper located directly in the tray and in the paper tray cavity.
At the back of the paper tray, press down on the paper tray lift to lock the lift down into position.

Insert Paper Tray 1 into the printer. Make sure to push the tray in all the way.
IMPORTANT: If the tray is extended for Legal (216 x 356 mm / 8.5 x 14 in.) size paper, the tray protrudes when in operating position in the printer.
NOTE: If the tray does not go all the way in, remove the tray and make sure the paper lift at the back of the tray is locked down.Insert the Bypass Tray into the printer, making sure to push the tray in all the way.
Verify the paper size and type on the Control Panel, if prompted. See the Related Content section for additional information.