Replace the Drum Cartridge (Imaging Unit)
- Product support for
- Phaser 3052, Phaser 3260
- Article ID
- KB0036936
- Published
- 2016-04-25
When it is time for a new Drum cartridge, the Machine Status light on the Control Panel blinks red.
To replace the Drum cartridge, follow the instructions provided below or with the consumable.
Open the Front Cover of the printer.
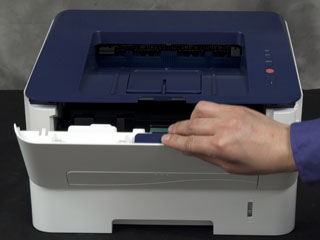
Pull out the Toner cartridge using the handle with the colored label and place it on a clean flat surface.
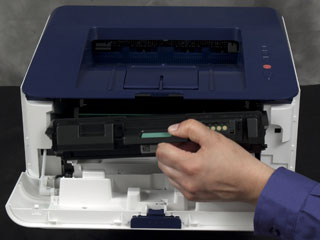
Pull out the Drum cartridge using the handle and place it on a clean flat surface.

Remove the new cartridge from the packaging. Use the handle on the cartridge to avoid touching sensitive parts that can be easily damaged.
CAUTION: Do not touch the green underside of the Drum cartridge. Use the handle on the cartridge to avoid touching this area.Hold the new Drum cartridge by the handle, insert it into the machine at an upright angle, and then push in and down to lock it into place.
Re-install the Toner cartridge.
Close the Front Cover. When the Machine Status light is solid green, the machine is ready.
