Replace the Print/Drum Cartridge
- Product support for
- AltaLink B8045 / B8055 / B8065 / B8075 / B8090 Multifunction Printer
- Article ID
- KB0027441
- Published
- 2019-08-14
NOTE: The images in this procedure are for demonstration purposes only and may not specifically match your printer model; colors, icons, and other minor differences may exist.
WARNINGS:
When replacing consumables do NOT remove the covers or guards that are fastened with screws. You cannot maintain or service any of the parts that are behind these covers and guards. Do NOT attempt any maintenance procedure that is NOT specifically described in the documentation supplied with your device.
Keep print cartridges upright, to avoid spillage, and do not place on unprotected surfaces.
IMPORTANT: Place any suspected defective cartridge that is removed from the printer in protective wrapping/packaging material for situations where it may still be a functioning cartridge. If you do not have the original packaging material, use the packaging from the new cartridge.
A message appears on the control panel when a print cartridge must be replaced.
Note: Each print cartridge includes installation instructions.
To replace the print cartridge:
Open the front door of the printer.
Rotate the orange print cartridge locking lever counterclockwise until it clicks. The lever is to the right of the print cartridge unit, which is labeled R2.

Open the left side door of the printer.
Unpack the new print cartridge.
Lift the orange cartridge handle slightly and pull the cartridge half out of the printer.

Lift the carrying handle on the top of the cartridge and use it to support the weight while you remove it from the printer.
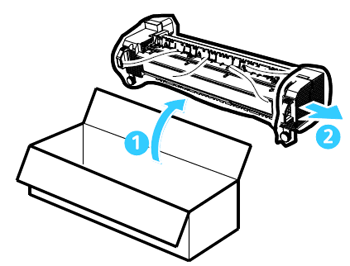
Place the used print cartridge in the box the new cartridge came in, and reseal the bag.

Insert the new print cartridge into the printer using the orange handle on the top to lift it.

Rotate the orange lever clockwise to latch the print cartridge into place.

Close the front door of the printer.