Clear the Paper Jam From the Exit Cover, Front Cover, and Paper Trays
- Product support for
- ColorQube 8570, ColorQube 8580, ColorQube 8870, ColorQube 8880
- Article ID
- KB0027086
- Published
- 2016-11-01
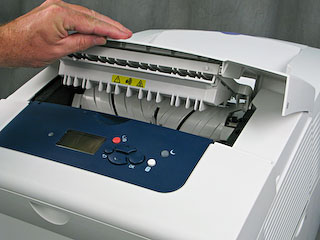
Open the Exit Cover on top of the printer.

Pull any jammed paper slowly out of the printer. Make sure there are no pieces of paper jammed remaining in the exit area.

Lift the paper guide and remove any jammed paper under the guide.

Lower the paper guide.
Close the Exit Cover.
If you did not find paper under the Exit Cover, perform the following steps below:
Open the Front Cover by pulling up the latch on the front of the printer.

Slowly remove any jammed paper from the printer. Make sure there are no pieces of paper jammed in the printer.

Close the Front Cover.
Remove the paper from Tray 1, open the Front Cover and then close the cover to allow the feed roller to align in the correct position.
Reload the paper in the tray, and then confirm the paper tray settings.
If you did not find jammed paper under the Front Cover, perform the following steps below:
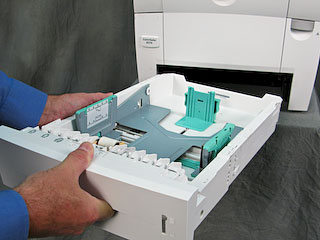
Pull all paper trays completely out of the printer.

Remove any jammed paper from inside the tray slots. Make sure there are no pieces of paper jammed in the tray slots.

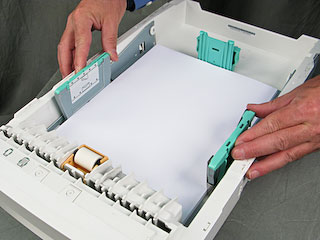
Make sure the paper is loaded correctly in the tray. See the Related Content for additional information.

NOTE: When the paper edge guides are correctly adjusted, there may be a small space between the paper and the guides.Adjust the length and width paper edge guides accordingly:
Length guides: Press the sides of the guide and then slide the guide until the arrow on the guide point to the appropriate paper size labeled on the bottom of the tray. When properly positioned, the guide will click into place.

Width guides: Slide the width guides until the arrows on the guides point to the appropriate paper size labeled on the bottom of the tray. When properly positioned, the guides will click into place.

Remove the top sheet of paper from the tray.
Re-install all paper trays and make sure they are completely closed.